















Your storefront's account settings are where you shape how your agent looks, sounds and behaves. You'll find them in your Swap dashboard under Agentic Storefront → Settings → Account.
Settings are grouped into tabs, and each section saves independently — so you can change one thing without touching the rest.
Agent setup
Your agent's voice
Pick the voice your agent speaks with from five out-of-the-box options, and play a sample of each before you choose. You can adjust how fast it speaks, and set the language it uses.
If you want to personalise the brand experience further, send us a brief sample of the voice you'd like to use (for example the founder) and we will configure a custom voice for your agent.
Welcome messages
Write the message shoppers see when they first open your agent. You can set a different one depending on who's arriving: a guest, a new customer, or a returning customer — and a separate message for a guest who already has items in their basket.
Each message can run to 500 characters, though shorter usually reads better.
Quick buttons
Quick buttons are the short prompts that appear beneath the product page, giving shoppers a one-tap way into a conversation. For example if you've just launched a new collection, you want to promote your new products, or you've just done a collab with another brand, you can include a quick note as a chip and direct customers immediately to it. In the Quick Buttons section you can add your own, remove the ones you don't want, and reorder them.
Keep them to roughly 40–50 characters so they don't wrap awkwardly. Things like "What's new in the store?" or "Comfortable everyday basics for a relaxed weekend" work well — a mix of browsing prompts and ones that reflect how your customers actually shop.
The agent widget
If you're running the agent as a widget on your own website rather than as a full storefront, this is where you style it:
- Theme — light or dark
- Density — compact or expanded
- Panel layout — a card that floats in the corner of your page, or a side panel that slides in from the edge at full height
- Widget domain — the address your widget runs on. We add it to our allow list so the widget can talk to Swap. Enter the host only, with no path. Changes take effect within a few minutes of saving.
Virtual try-on
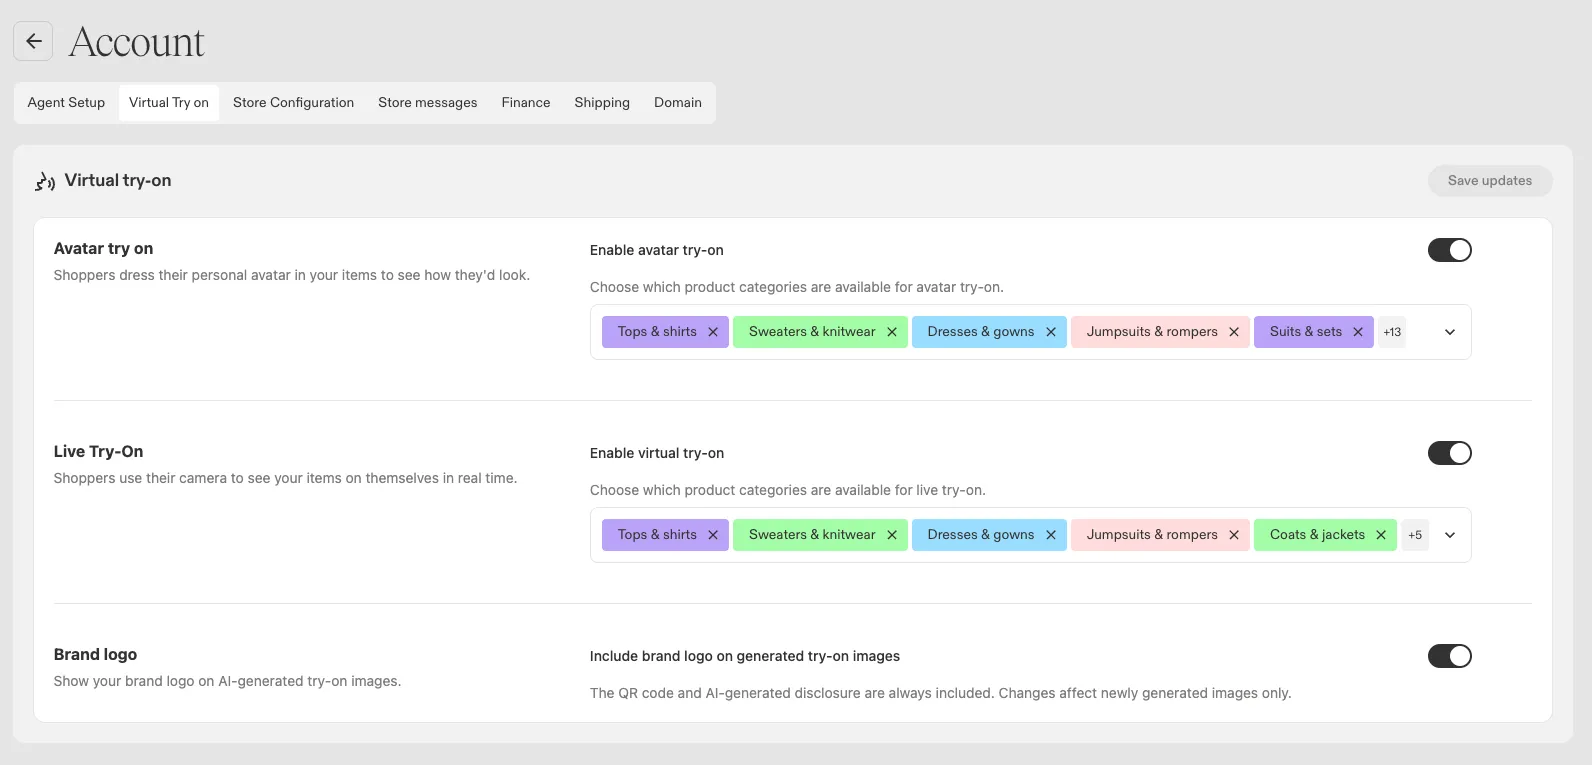
Turn avatar try-on and live try-on on or off independently, and choose which product categories each one is available for. Categories you don't select simply won't offer try-on to shoppers.
You can also choose whether your brand logo appears on generated try-on images. The QR code and the AI-generated disclosure are always included and can't be switched off. Changing this affects newly generated images only — anything already created stays as it is.
Store configuration
Brand and visual system
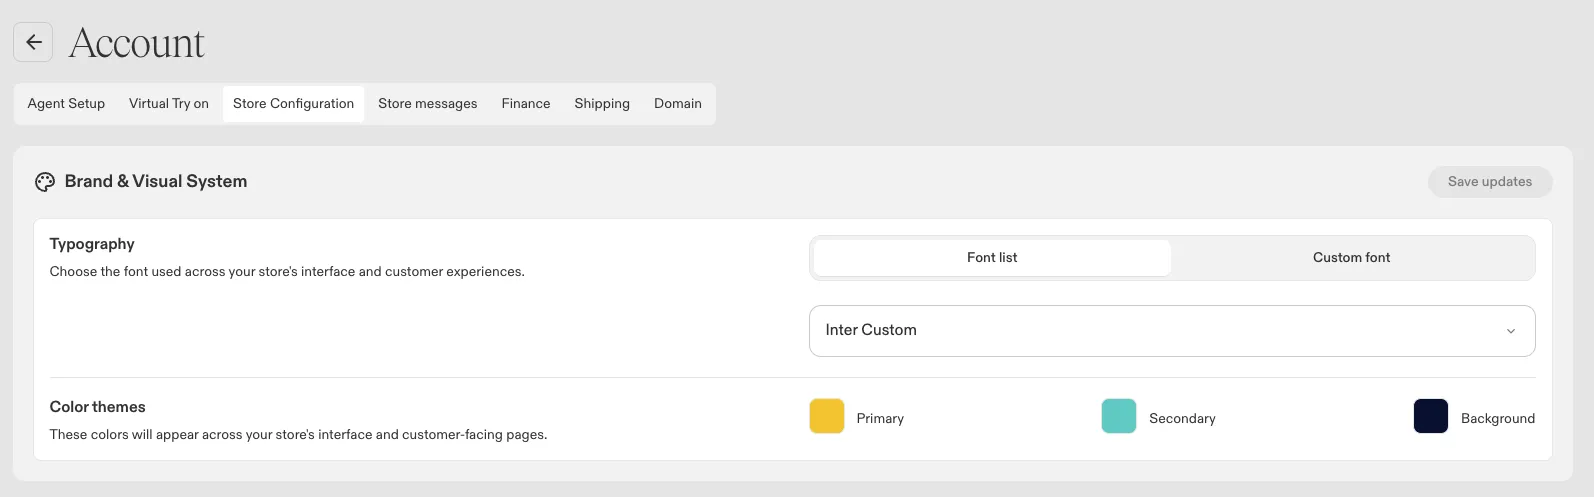
Set the font used across your storefront — either from our font list or your own custom font — and the three colours that carry your brand through the interface: primary, secondary and background.
Basic store information
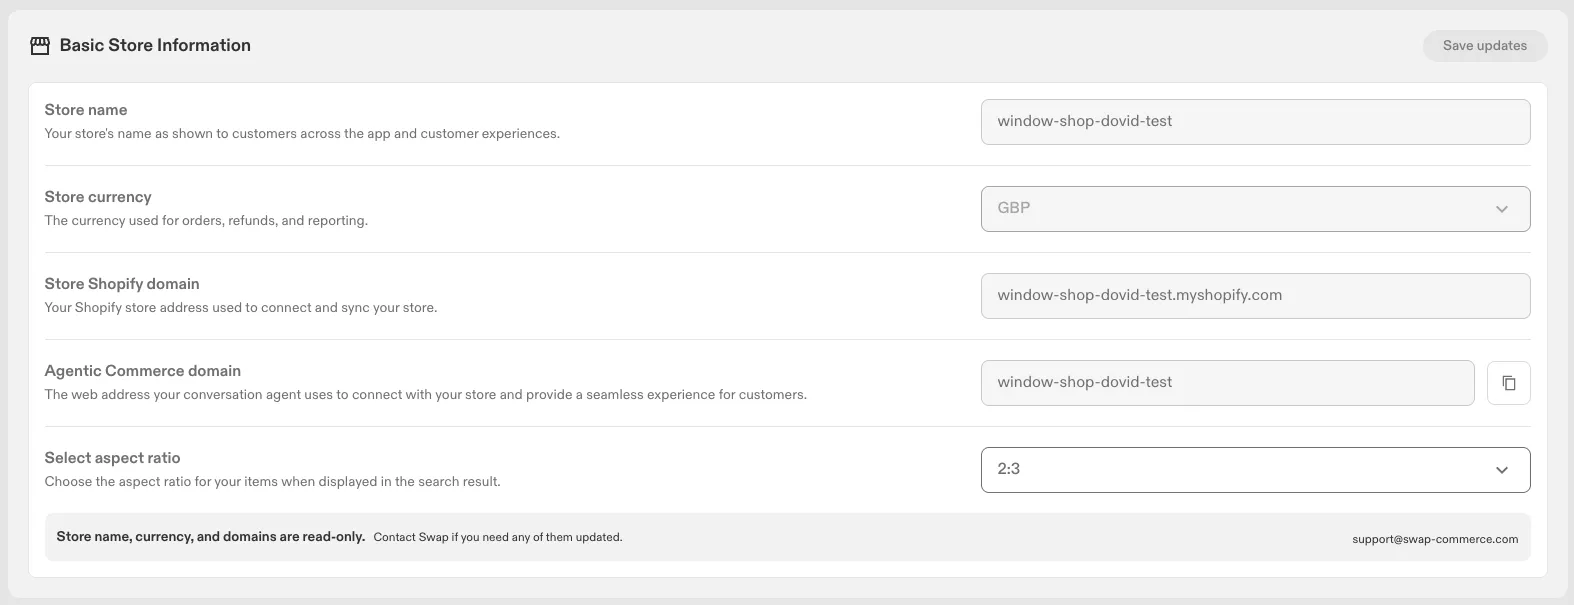
Your store name, currency and domains are shown here for reference but are read-only — contact support@swap-commerce.com if any of them need changing.
You can set the aspect ratio your products are displayed at in search results, which is worth matching to how your product photography is shot.
Website URL
The link shoppers use to get from your storefront menu back to your main website. It must start with https://. Leave it empty if you'd rather not show the link at all.
Customer support
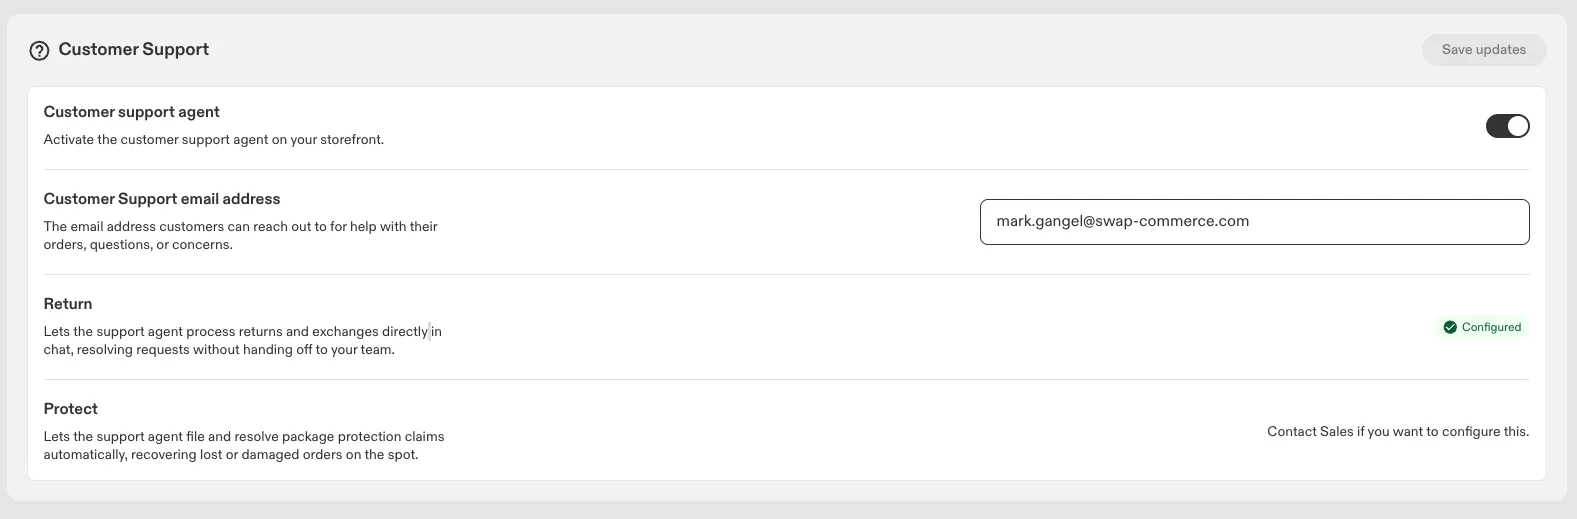
Switch the customer support agent on or off for your storefront, and set the email address shoppers can reach you on for help with orders and questions.
Two capabilities can be enabled on top:
- Returns — lets the support agent process returns and exchanges directly in the conversation, resolving requests without handing off to your team.
- Protect — lets the support agent file and resolve package protection claims automatically, recovering lost or damaged orders in the conversation. Speak to your Swap contact if you'd like this set up.
Images and logos
Upload the visual assets your storefront uses:
- Store logo — appears on your splash screen and navigation bar
- Favicon — the small icon representing your brand in a browser tab. PNG only.
- Desktop brand imagery — shown on the load and splash screens. 16:9 or 4:3, up to 300KB.
- Mobile brand imagery — the same, sized for phones. 9:16 or 4:5, up to 300KB.
Store messages
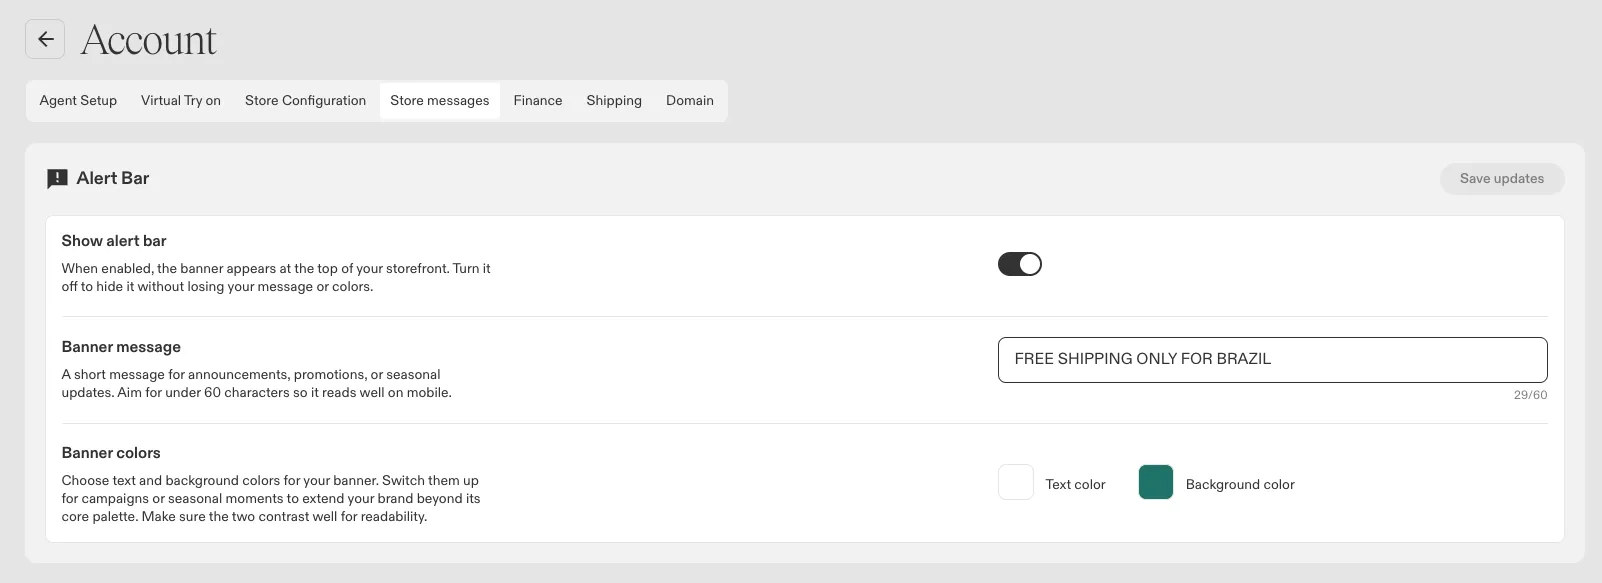
Add an alert bar across the top of your storefront for announcements, promotions or seasonal messages — free shipping thresholds, sale dates, that sort of thing.
Keep the message under 60 characters so it reads well on mobile, and set the text and background colours to suit the campaign. You can switch the bar off without losing the message or colours you've set, so a seasonal banner can be reused rather than rewritten.
Finance
Your billing and invoicing for the storefront.
Shipping
The shipping rates shoppers see when they place an order, each marked active or inactive, with one set as your default.
Domain
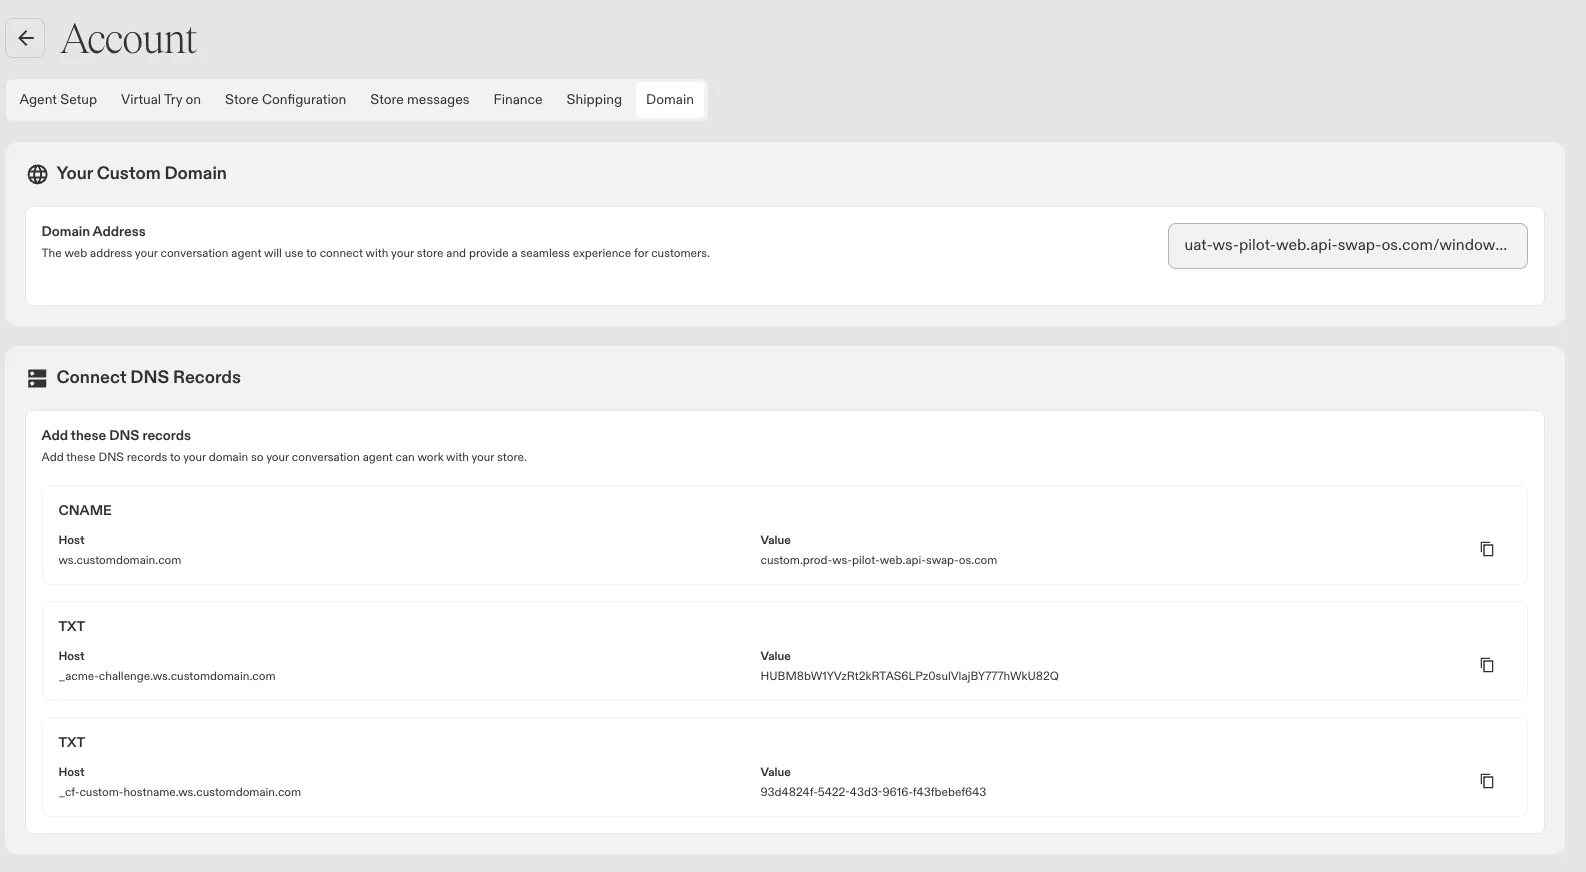
Your storefront's web address, plus the DNS records you'll need to add if you're running it on your own custom domain. The CNAME host and value are both shown with a copy button, ready to hand to whoever manages your DNS.
Settings that live elsewhere
One thing you might expect to find here has its own home:
- What products your storefront shows — hiding and promoting collections, ordering, and product imagery live under Merchandising. See Understanding Visual Merchandising.